The Denodo Platform enables users to easily build integrations between disparate sources of data while minimizing the need for data replication. This makes it possible to create a unified view of all corporate data assets, irrespective of their physical location. In this guide, you will be guided through the process of creating a customer prospect list by combining data from 3 distinct sources of data for a new marketing campaign.
Target Personas
- Data Engineer
- SQL Developer
Exercise overview: Create a list of prospects for a new marketing campaign
In our example, you are a data architect tasked with helping a new marketing campaign for a company by combining the relevant datasets into a usable format for the business users. You have been tasked with creating a list of target customer prospects. In particular, customers prospects who own more than 2 vehicles from zip codes with a population of more than 50,000.
The data needed for this exercise includes customer profile data from a relational database, household demographics data from a REST API call, and zip code population data from an Excel file. We will need to connect these data sources to Denodo (although that step is already done for you), combine their data, and shape the final result, to make it available to our data consumers, the marketing team in this case.
Instructions
Create your integrated data views
Launch Design Studio, the development tool included in the Denodo Platform. You will find a link to open it in the “My applications” section of the Agora environment.
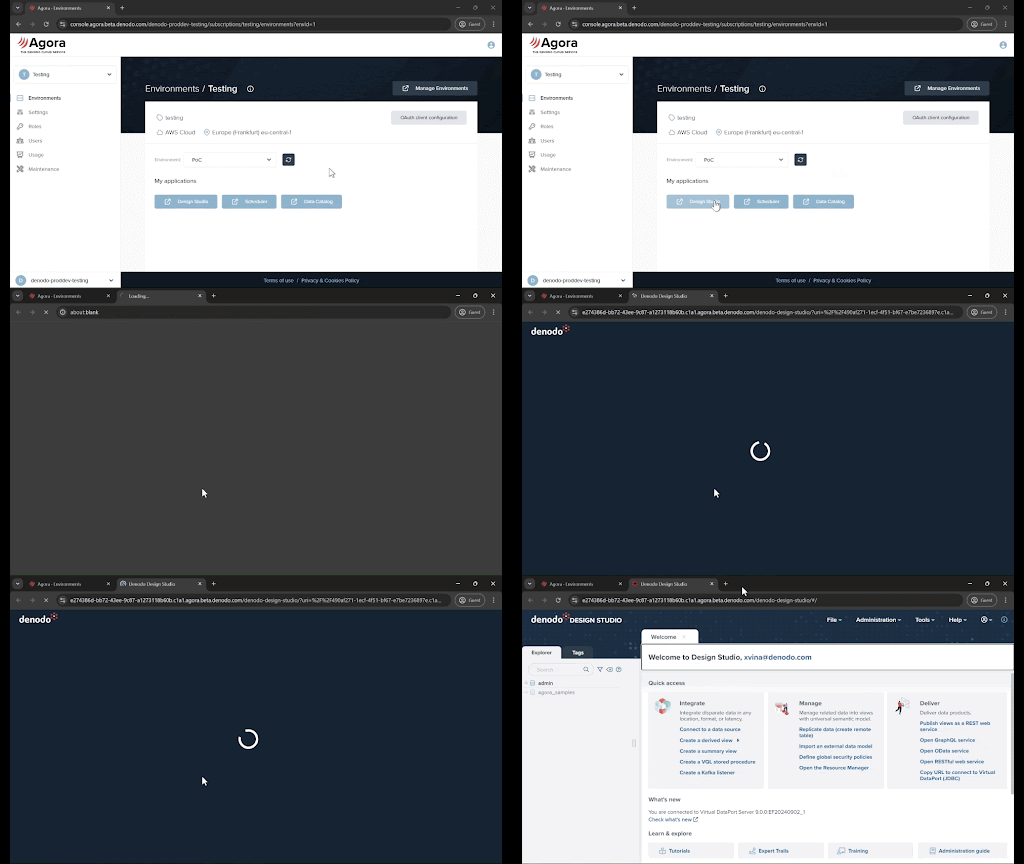
Once open, you will see the welcome portal with quick access to the most common features, as well as access to documentation and tutorials. Design Studio resembles a database management tool, so if you are familiar with databases, you will find yourself at home!
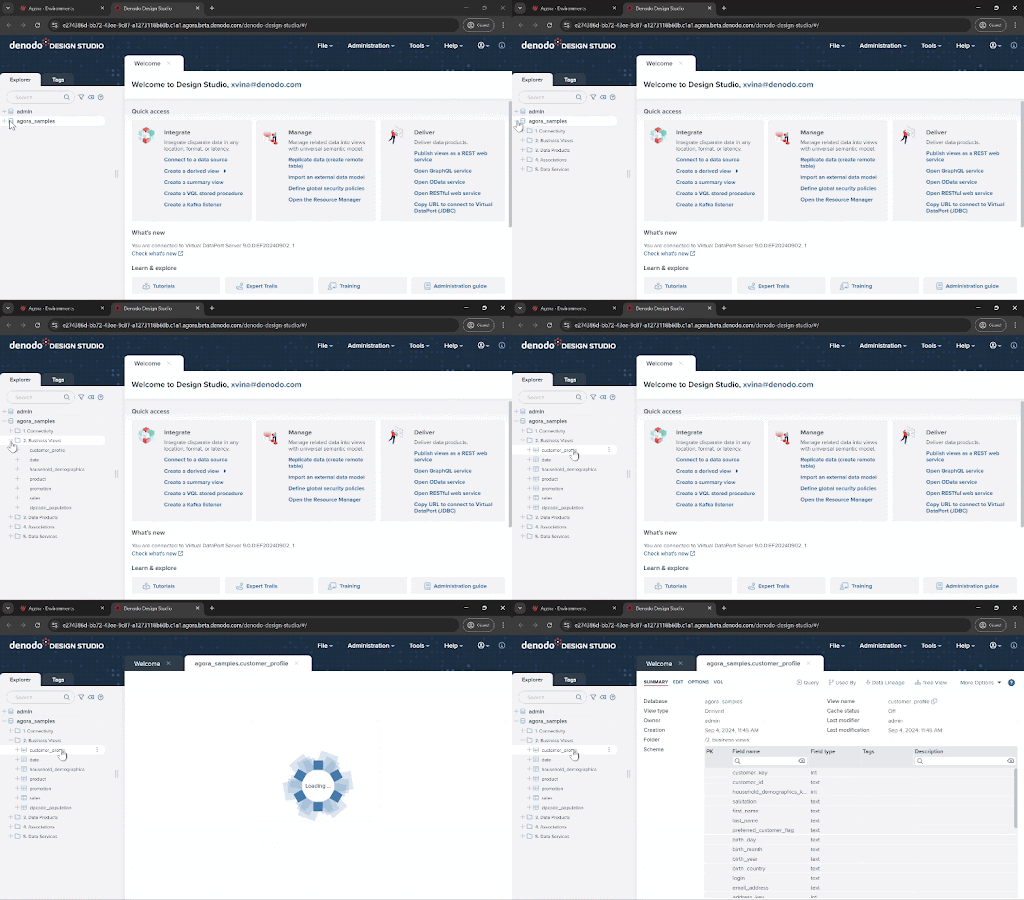
- On the left panel, under the “Explorer” tab, you will see different virtual databases (represented by the classic database icon). The artifacts necessary for this exercise are under “agora_samples”
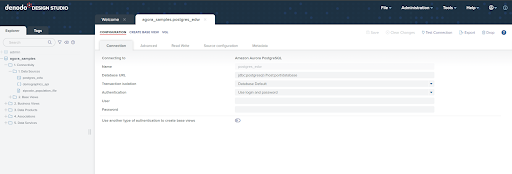
Expand the “agora_samples” virtual database and expand the “1. Connectivity” folder to find the predefined data sources. Within this folder, you will find the connection definitions needed to access data from the three different systems we mentioned earlier. Each connection created by Denodo is optimized to use the specific SQL dialect and connection methods for the specific data source. Although they have already been pre-created for you, it’ll be useful to double-click on them to open them and see their details.
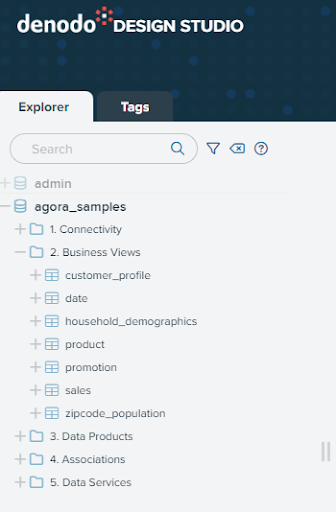
Open “2. Business Views” folder. Here you can find the views, which represent the data artifacts we will use in this guide.
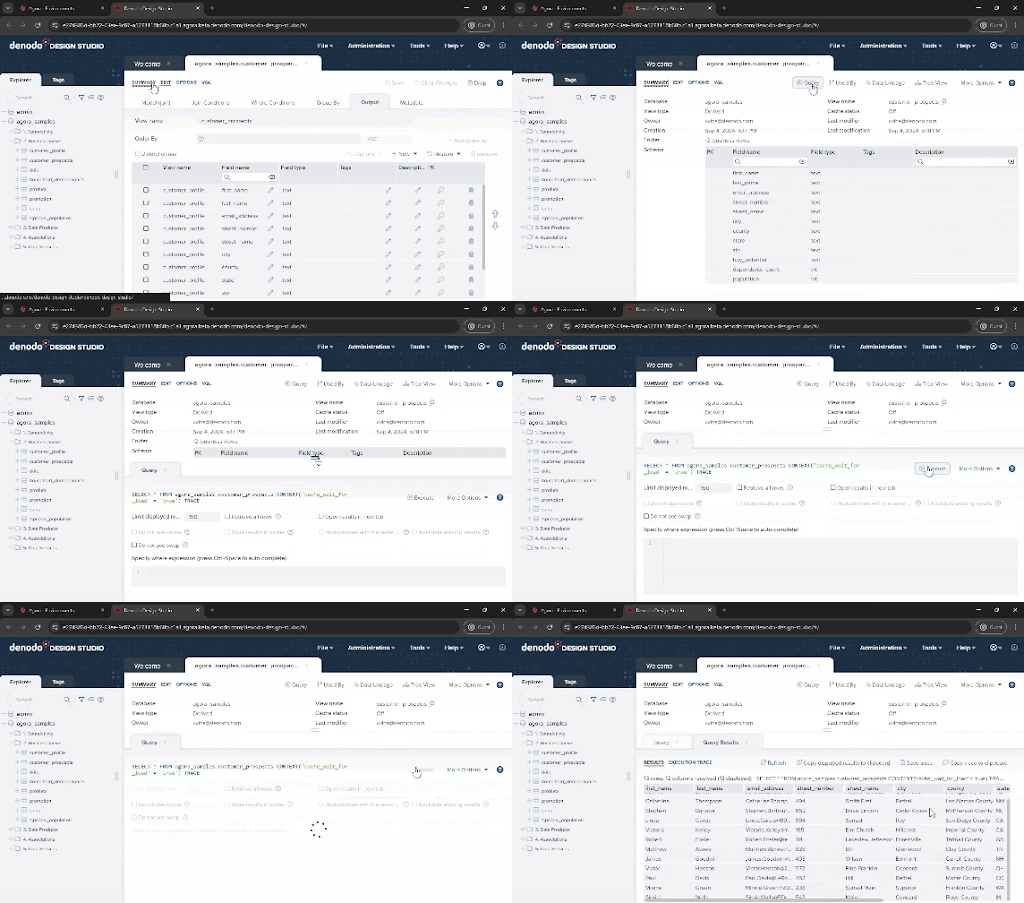
You can open them by double-clicking to see more details. You will see that Denodo made a virtual representation of your data in the form of a relational table, and in fact you can query them using SQL (try the “Query button” for that!).
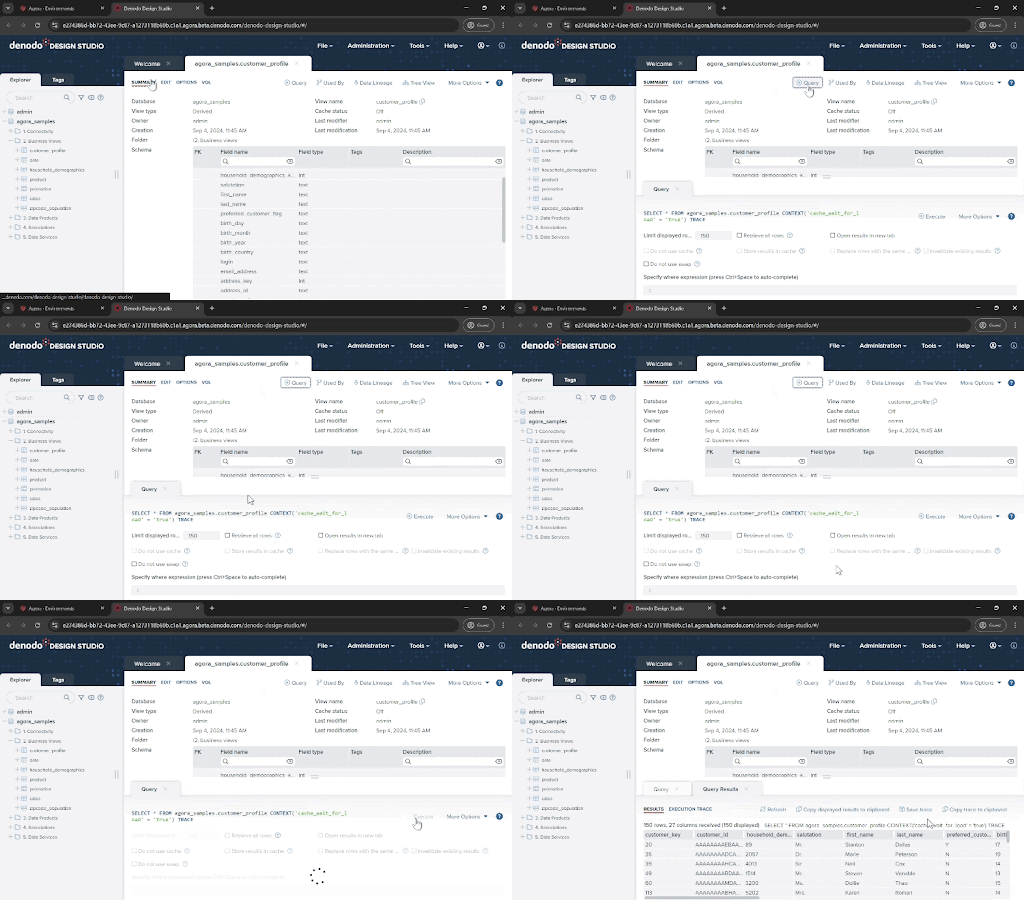
- Note that some of the views you see here didn't originate from a relational database. Some data comes from flat files (household_demographics) and data service APIs (zipcode_population), but they are represented in the Denodo Platform as relational tables. These objects, named “base views” in Denodo, provide you with the abstraction between data sources and consumption, which will be a key ingredient for the next steps
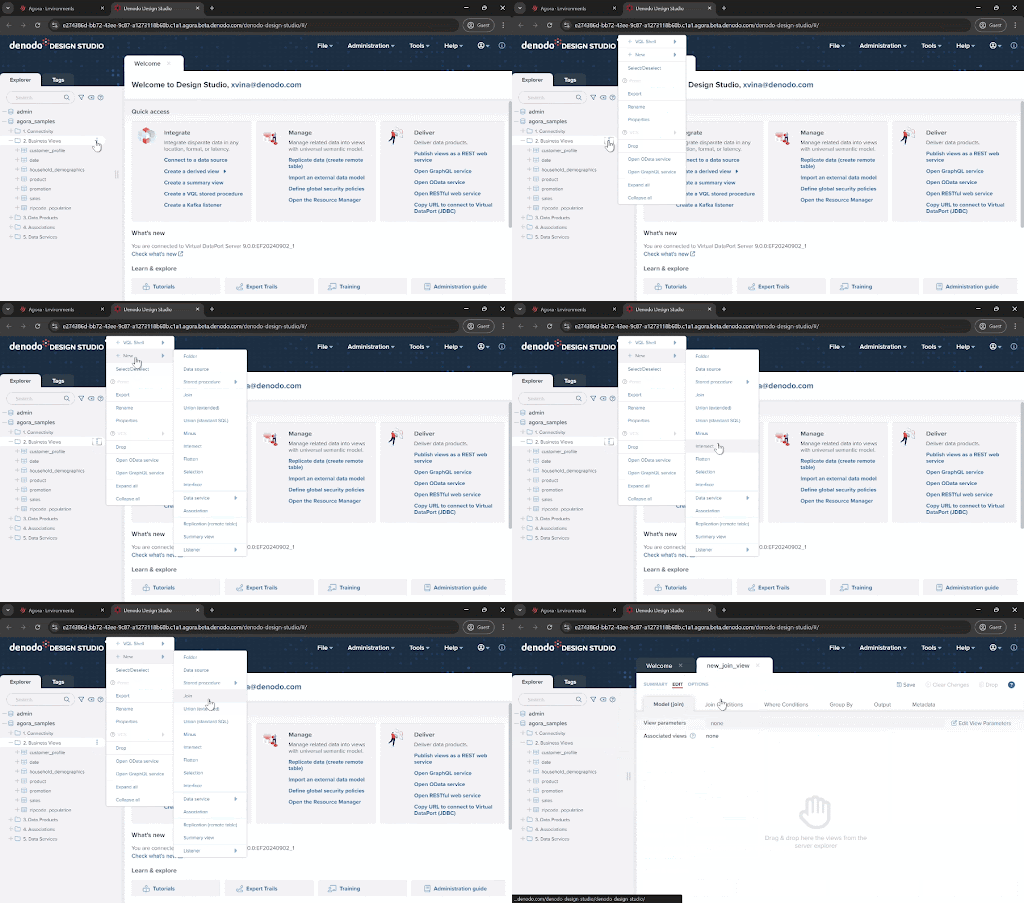
Now, let’s combine the data and build the final view we need. To do so, click on the ellipsis next to the “3. Data Products” folder and select “New->Join”
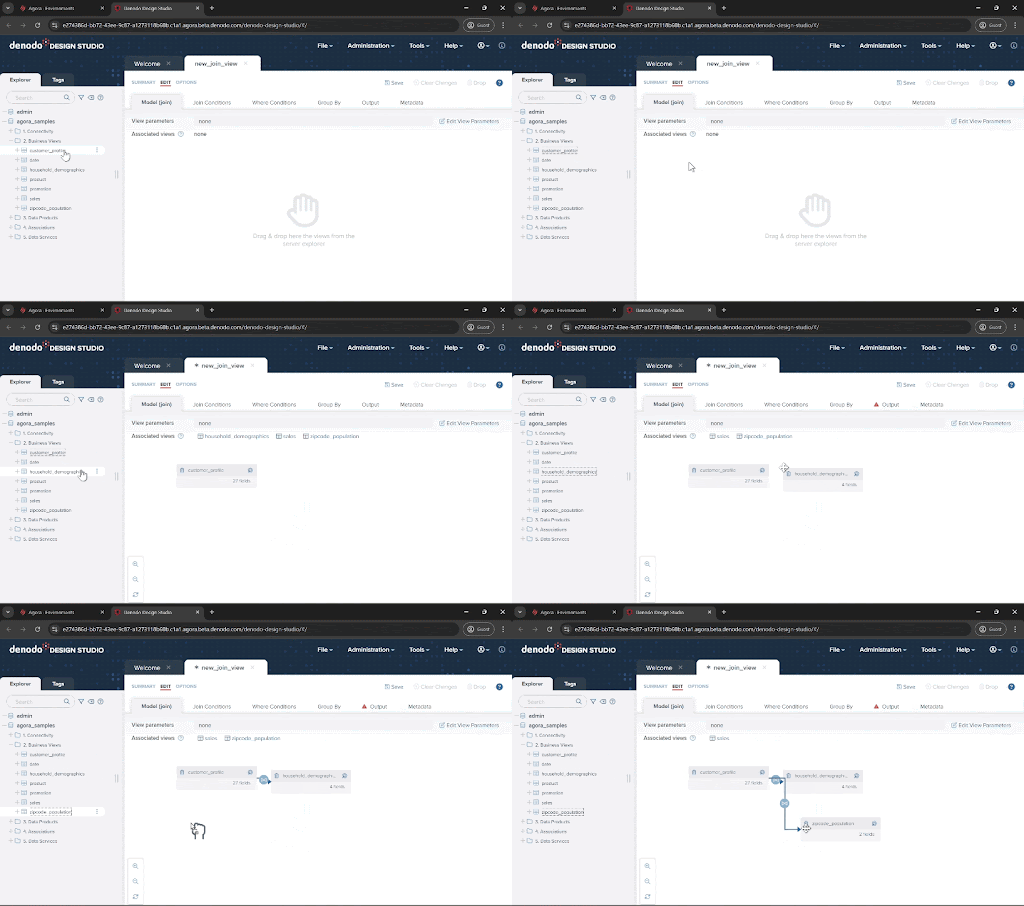
Drag the customer_profile, household_demographics, and zipcode_population views from the “2. Business Views” folder and drop onto the new_join_view window. You will see that the JOIN conditions are set automatically. This is because there are already associations defined across these data views. You can also manually create and modify the join conditions yourself.
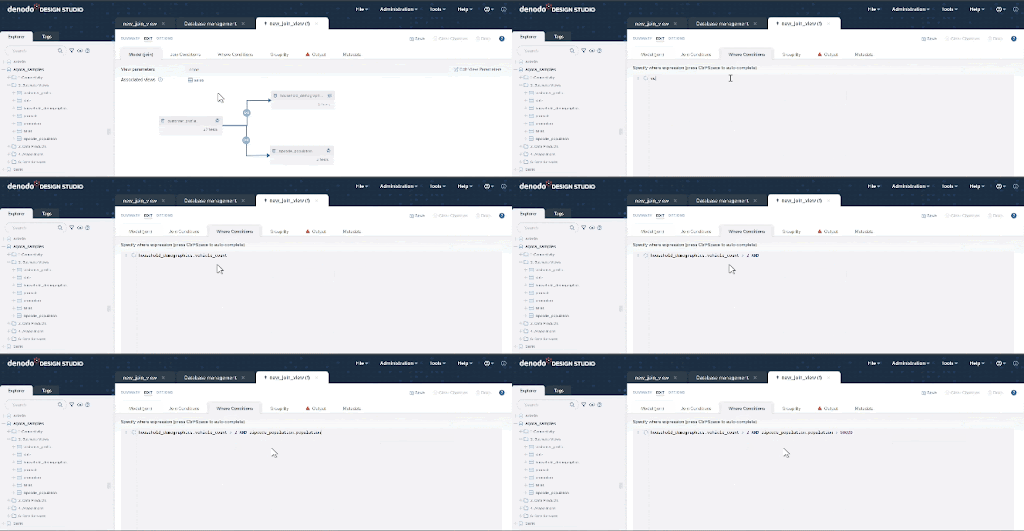
Now we need to incorporate the filters to accommodate our target population. Click on the “Where Conditions” tab and add the following. You can copy & paste the condition below, and also leverage the autocomplete features of this panel using Ctrl + Space: vehicle_count > 2 and population > 50000
- Let’s move now to the “Output” tab to define the structure of our results. Here you can add or remove fields, change their names, or apply transformations to the data.
There are many fields here that we don’t need. An easy way to remove them is to select the select_all checkbox circled in the image below to select all attributes, and then uncheck the ones we want to keep: first_name, last_name, email_address, street_number, street_name, city, state, zip, population, buy_potential, dependents_count, and vehicle_count. Then click on the “Remove” button.
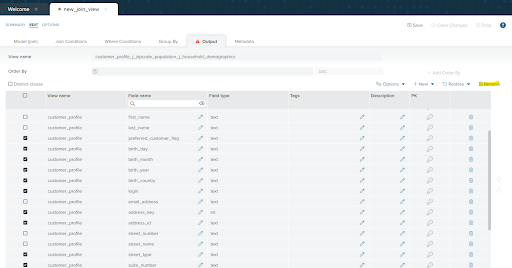
- If you have made any mistake, don’t worry. You can use the options to restore fields under the “Restore” button
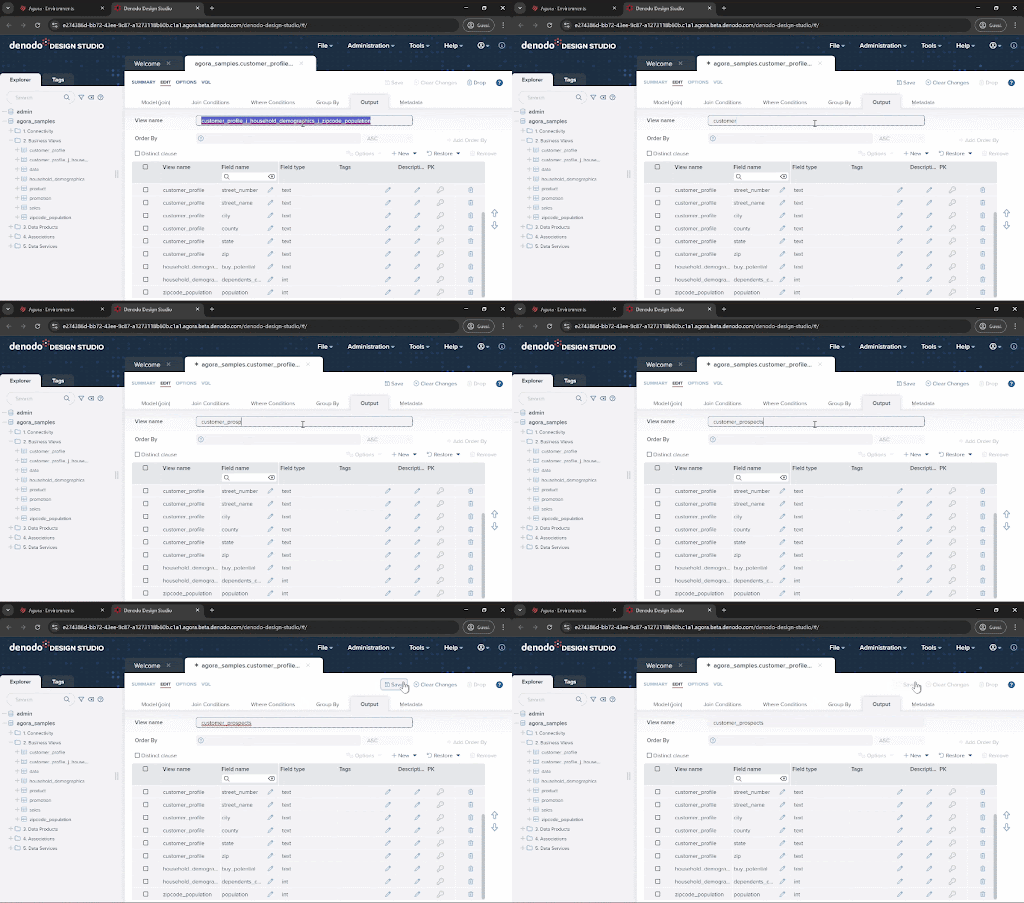
Let’s give this data view a good name! Enter customer_prospects in the “View name” field and click “Save”
Running your queries
Curious about the results? Click on “Query” then “Execute” to view the integrated dataset
- If you want to run any other queries, you can open the shell using Tools > VQL Shell and build your own SQL queries. You can also connect to Denodo via JDBC or ODBC or use the built-in adapters in the most popular reporting tools like Tableau, PowerBI and many others.
** CALLOUT NOTE** Since Agora is running in its own VPC, keep in mind that your IT team may need to perform VPC peering to allow that connection.
More advanced topics
For a quick onboarding guide, you have already done a lot in just a few minutes! This agility is one of the key values of a logical layer enabled by the Denodo Platform. In the section below we touch on some more advanced topics that expert SQL engineers and data integrators will find useful to understand other advanced capabilities that the Denodo Platform brings to the table
Choosing your execution strategy
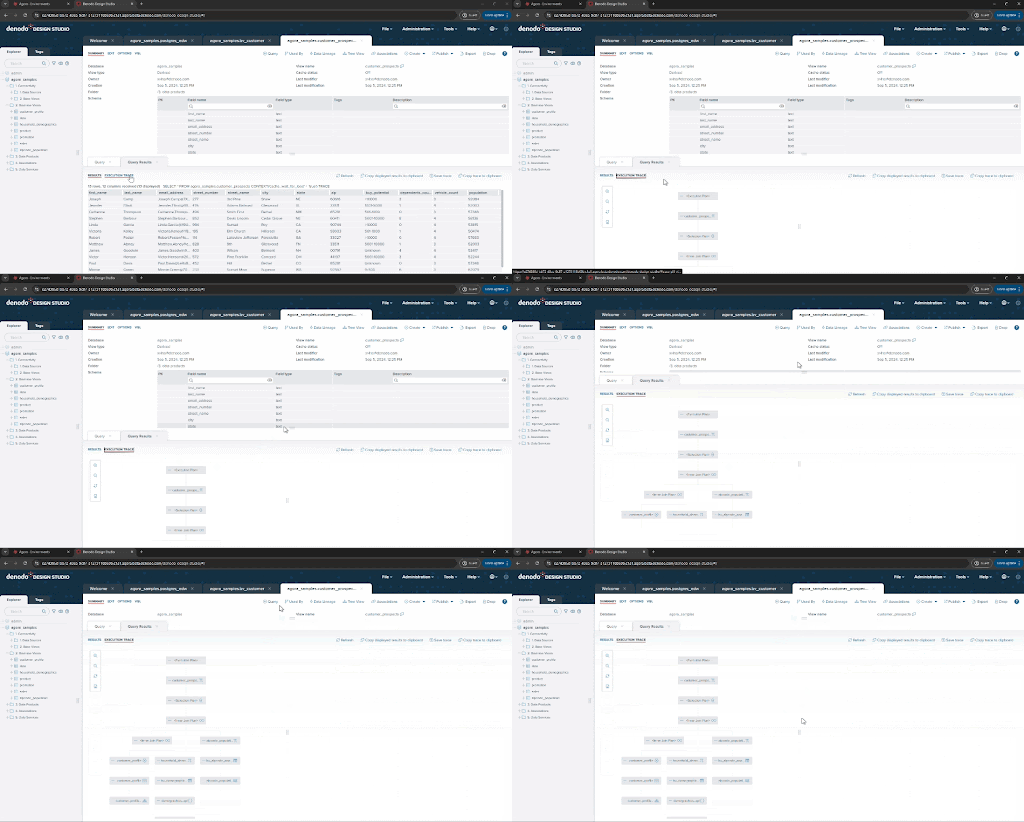
Right now, you’ve run this query using Denodo’s federation engine, pulling data directly from the source at execution time. If you click the Execution trace option in the query panel or VQL shell you can see the details of what the engine has done and each execution branch, tracing back up to the three original data sources.
This approach is great in many scenarios, for example, to guarantee the freshness of data, or to avoid creating and managing ingestion pipelines when that process is not cost effective or agile enough for our needs. But there are also situations where you may need to replicate data. The Denodo Platform allows you to choose either strategy easily and offers multiple options to persist data. :
- The easiest way to persist your data in a different database is using Denodo’s cache capabilities.
- In order to do so, you first need to enable and configure the cache settings at the server level, as they are disabled by default
- ** CALLOUT NOTE ** Agora’s cache settings will depend on your specific deployment and therefore are not automatically configured. Please talk to your Denodo administrators to help you configure the cache system before trying the features below.
- Once configured, you can enable caching for any data view to persist its content in a relational database. Simply go to Options > Cache and configure the options that fit your use case. You can find an in-depth analysis of this topic in this KB article
For instance, in this exercise, you may want to persist the final results, but could also persist the datasets coming from the API or the file if their performance was not adequate for your use case
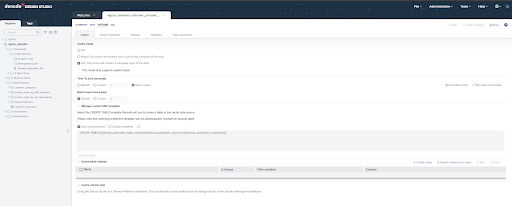
- In order to do so, you first need to enable and configure the cache settings at the server level, as they are disabled by default
- Alternatively, you can use Denodo’s remote table capabilities. This option gives you more flexibility to configure the target system, the database and schema, the table name, and even the specific DDL command used to create the table. You can find this option on the top right options in any data view, just search for Create > Replication (remote table)
You should also set refresh settings to keep the data current. You can easily set up a refresh job from the cache screen. And although maybe a bit out of scope for this onboarding guide, you may also want to learn about more advanced features like incremental loads with UPSERT/MERGE, direct loads as ELT commands, or Denodo’s aggregate-aware Smart Query Acceleration, that complement the caching and replication features for more complex requirements.
Create and publish an API
Another powerful capability that the Denodo Platform offers is the ability to publish web services for your data models with no additional coding required. You can publish these data views as APIs using common industry standards including SOAP, REST, OData 4, and GraphQL.
To do so, open your data view and click “Publish”. You will see the list of protocols available, feel free to experiment with them. In the case of REST, there are some additional options that you can configure, so click on REST web service to continue with the exercise
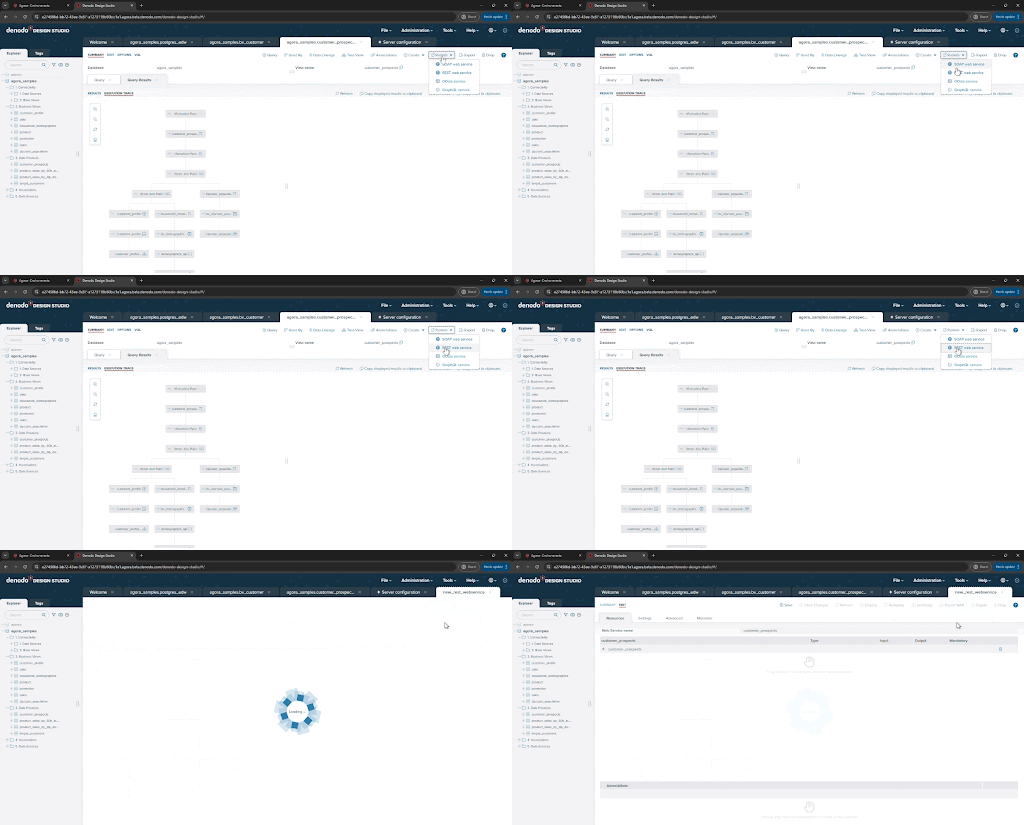
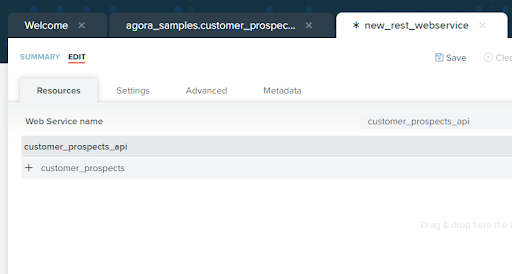
First, name the endpoint, for example, customer_prospects_api as the web service name
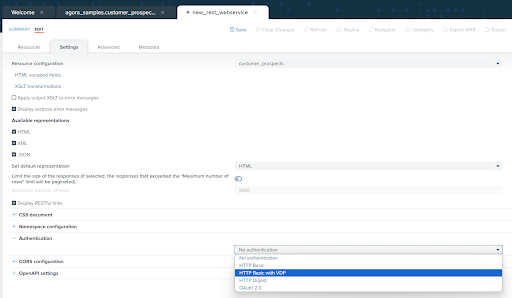
You also have a variety of authentication options. Click on the “Settings” tab, expand the “Authentication” section, and select “HTTP Basic with VDP” as the authentication type to require users of the API to authenticate through Denodo.
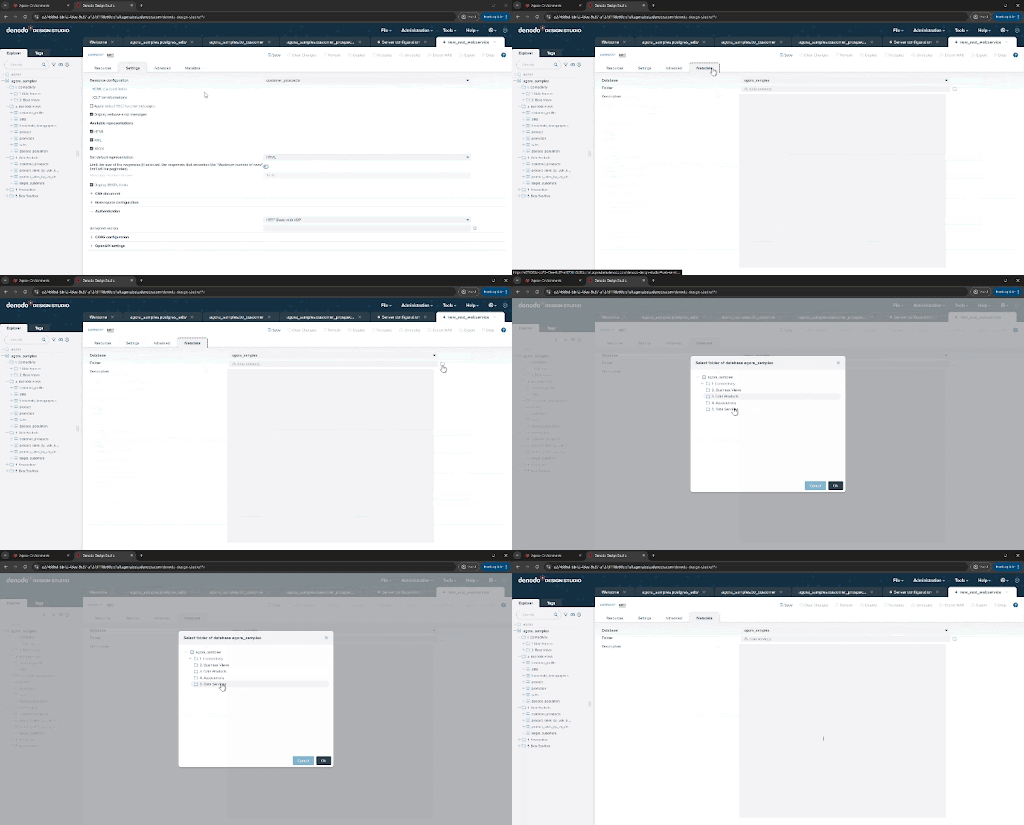
Let’s keep things tidy. Click on the “Metadata” tab, select the folder icon next to the “Folder” field, then select “5. Data Services” from the list of folders and click “Ok”.
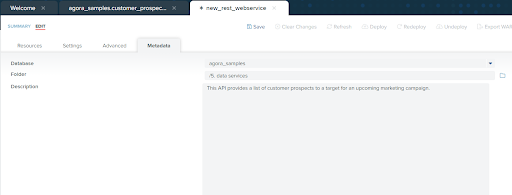
Documentation is always important. Enter an appropriate description for this API in the "Description” field then click “Save”.
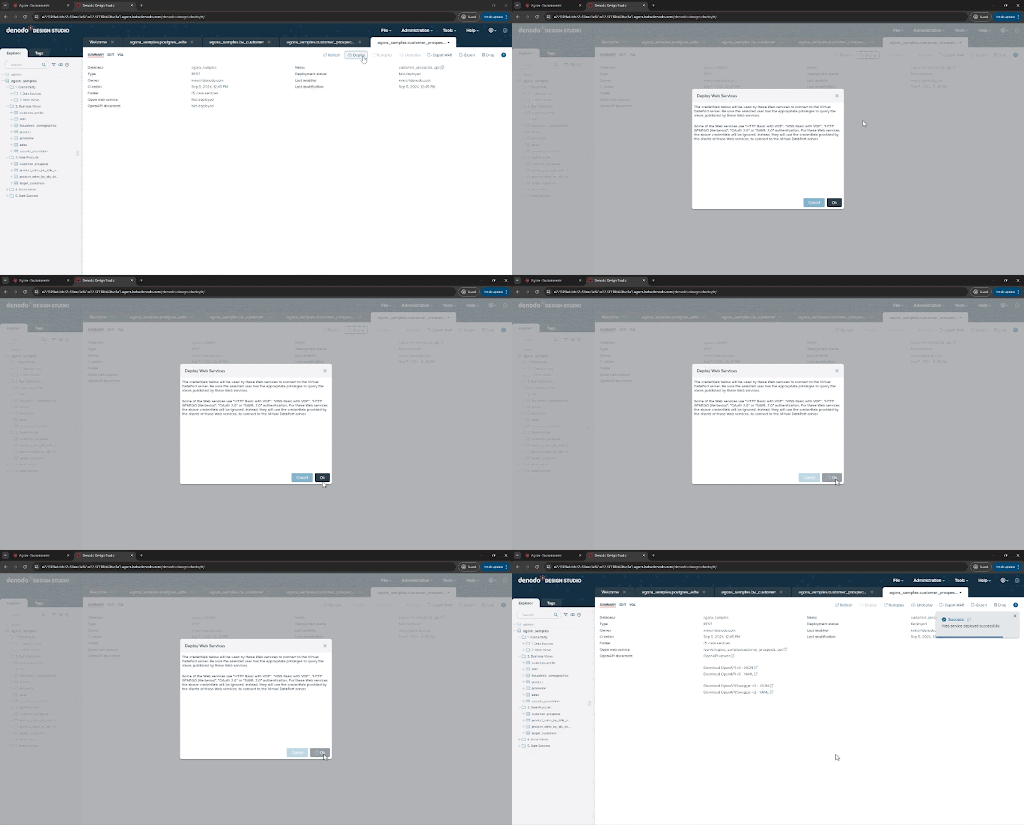
Click “Deploy” to deploy the newly created API. That’s it!
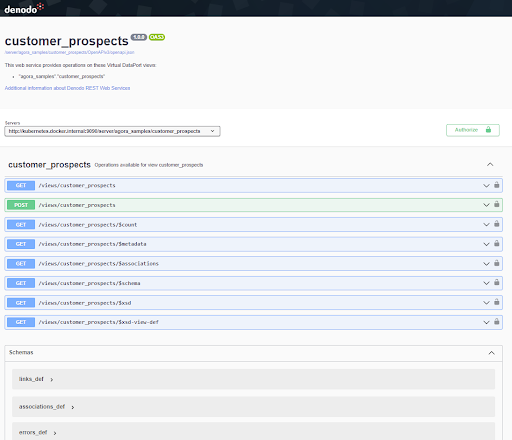
The Denodo Platform automatically creates OpenAPIv3 documentation for the rest endpoint. Click on the “OpenAPI viewer” link to see it in your browser, including examples and details on HTTP codes
Summary
In this tutorial, you have learned the basics of how a data engineer works with the Denodo Platform, and we have touched on topics like:
- Connectivity to diverse data sources
- Data source abstraction through Denodo’s base views
- Definition of derived data views that combine data, even across sources
- Execution of SQL queries
- More advanced topics such as:
- Use of different execution techniques, including multi-source federation and different data replication options
- Publication of no-code APIs
This is the foundation for many use cases, ranging from data analytics to data science or operational applications. We hope that this brief overview gave you a good understanding of the Denodo Platform's capabilities, and a glimpse into its main business values, like data agility. There is a lot more to uncover in other tutorials, like security, governance, and the value of a semantic layer. We encourage you to continue with the Data Product creation guide, but also to take a look at our many online resources available in the Denodo Community
